Tenant to Tenant Intune Device Migration Part 4: The Bulk Token
So, remember how I promised I would talk about the SetPrimaryUser task in this post? It’s not that I don’t want to, but I just realized it’s not going to make much sense without context. Allow me to introduce you to the two components that make this process possible; the bulk primary refresh token and Windows runtime provisioning package.
I’m going to talk a little bit about each and how they work in the migration process.
Bulk Primary Refresh Token
Since it’s introduction, Windows 10 allowed for Azure AD join, connecting the PC to an Azure tenant without a local Active Directory domain join. Automatic Intune enrollment can also be enabled, allowing a device to enroll as soon as it joins Azure AD.
Typically, this process is facilitated by the end user. Whether during the out-of-box-experience, with Autopilot, or just adding a work/school account in settings, users could join Azure AD and enroll to Intune by signing in with their credentials and receiving a primary refresh token (PRT). The PRT is the primary authentication component for Azure AD. But what happens when an organization wants to enroll a lot of devices very quickly, without the end user?
Enter the PRT’s cousin; the bulk primary refresh token (BPRT). And it does exactly what you think it would. The BPRT acts as a service principle in Azure AD and enables organizations to authenticate PCs directly to Azure AD without the need to sign in over and over again.
While the BPRT was designed for Intune enrollment, there’s a lot more to it. I implore you to check out this ridiculously awesome, deep-dive on the subject by Microsoft MVP, Dr. Nestori Syynimaa.
Runtime Provisioning Package
A provisioning package is essentially a group of settings and customizations that are bundled into a package that Windows can read. This package is used to automatically apply configurations to a PC, or in most cases, many PCs. The runtime provisioning package is the vehicle used to deliver the BPRT to a device.
In order to create a provisioning package and BPRT, we need the Windows Configuration Designer app. I will tell you, this app has always been somewhat unreliable in the way it works, so I really only use it for the BPRT and least amount of settings possible. I don’t recommend creating full-on device customizations with it. That’s what Intune is for.
Why do we need it?
When our migration process runs, it will remove the device from Tenant A Azure AD and will need to be moved to Tenant B. But how will the device know what Tenant B is without any user input? That is exactly what the provisioning package will do.

By installing the package with our StartMigrate script, we’re placing the device in Tenant B before the reboot, but without any user affinity. After the reboot, the user can then sign into Tenant B with the device already being enrolled.
How to make it?
There are two flavors of the Configuration Designer; one available from the Microsoft Store as a UWP, and the other is included in the Windows Assessment and Deployment Kit (ADK). We’re going to walk through two methods of creating a provisioning package with a BPRT.
MICROSOFT STORE VERSION
First, download the Windows Configuration designer from the Microsoft Store.

Launch the app, and choose the option for “Provision desktop devices” and provide a package name. Our script templates assume the package name is migration.

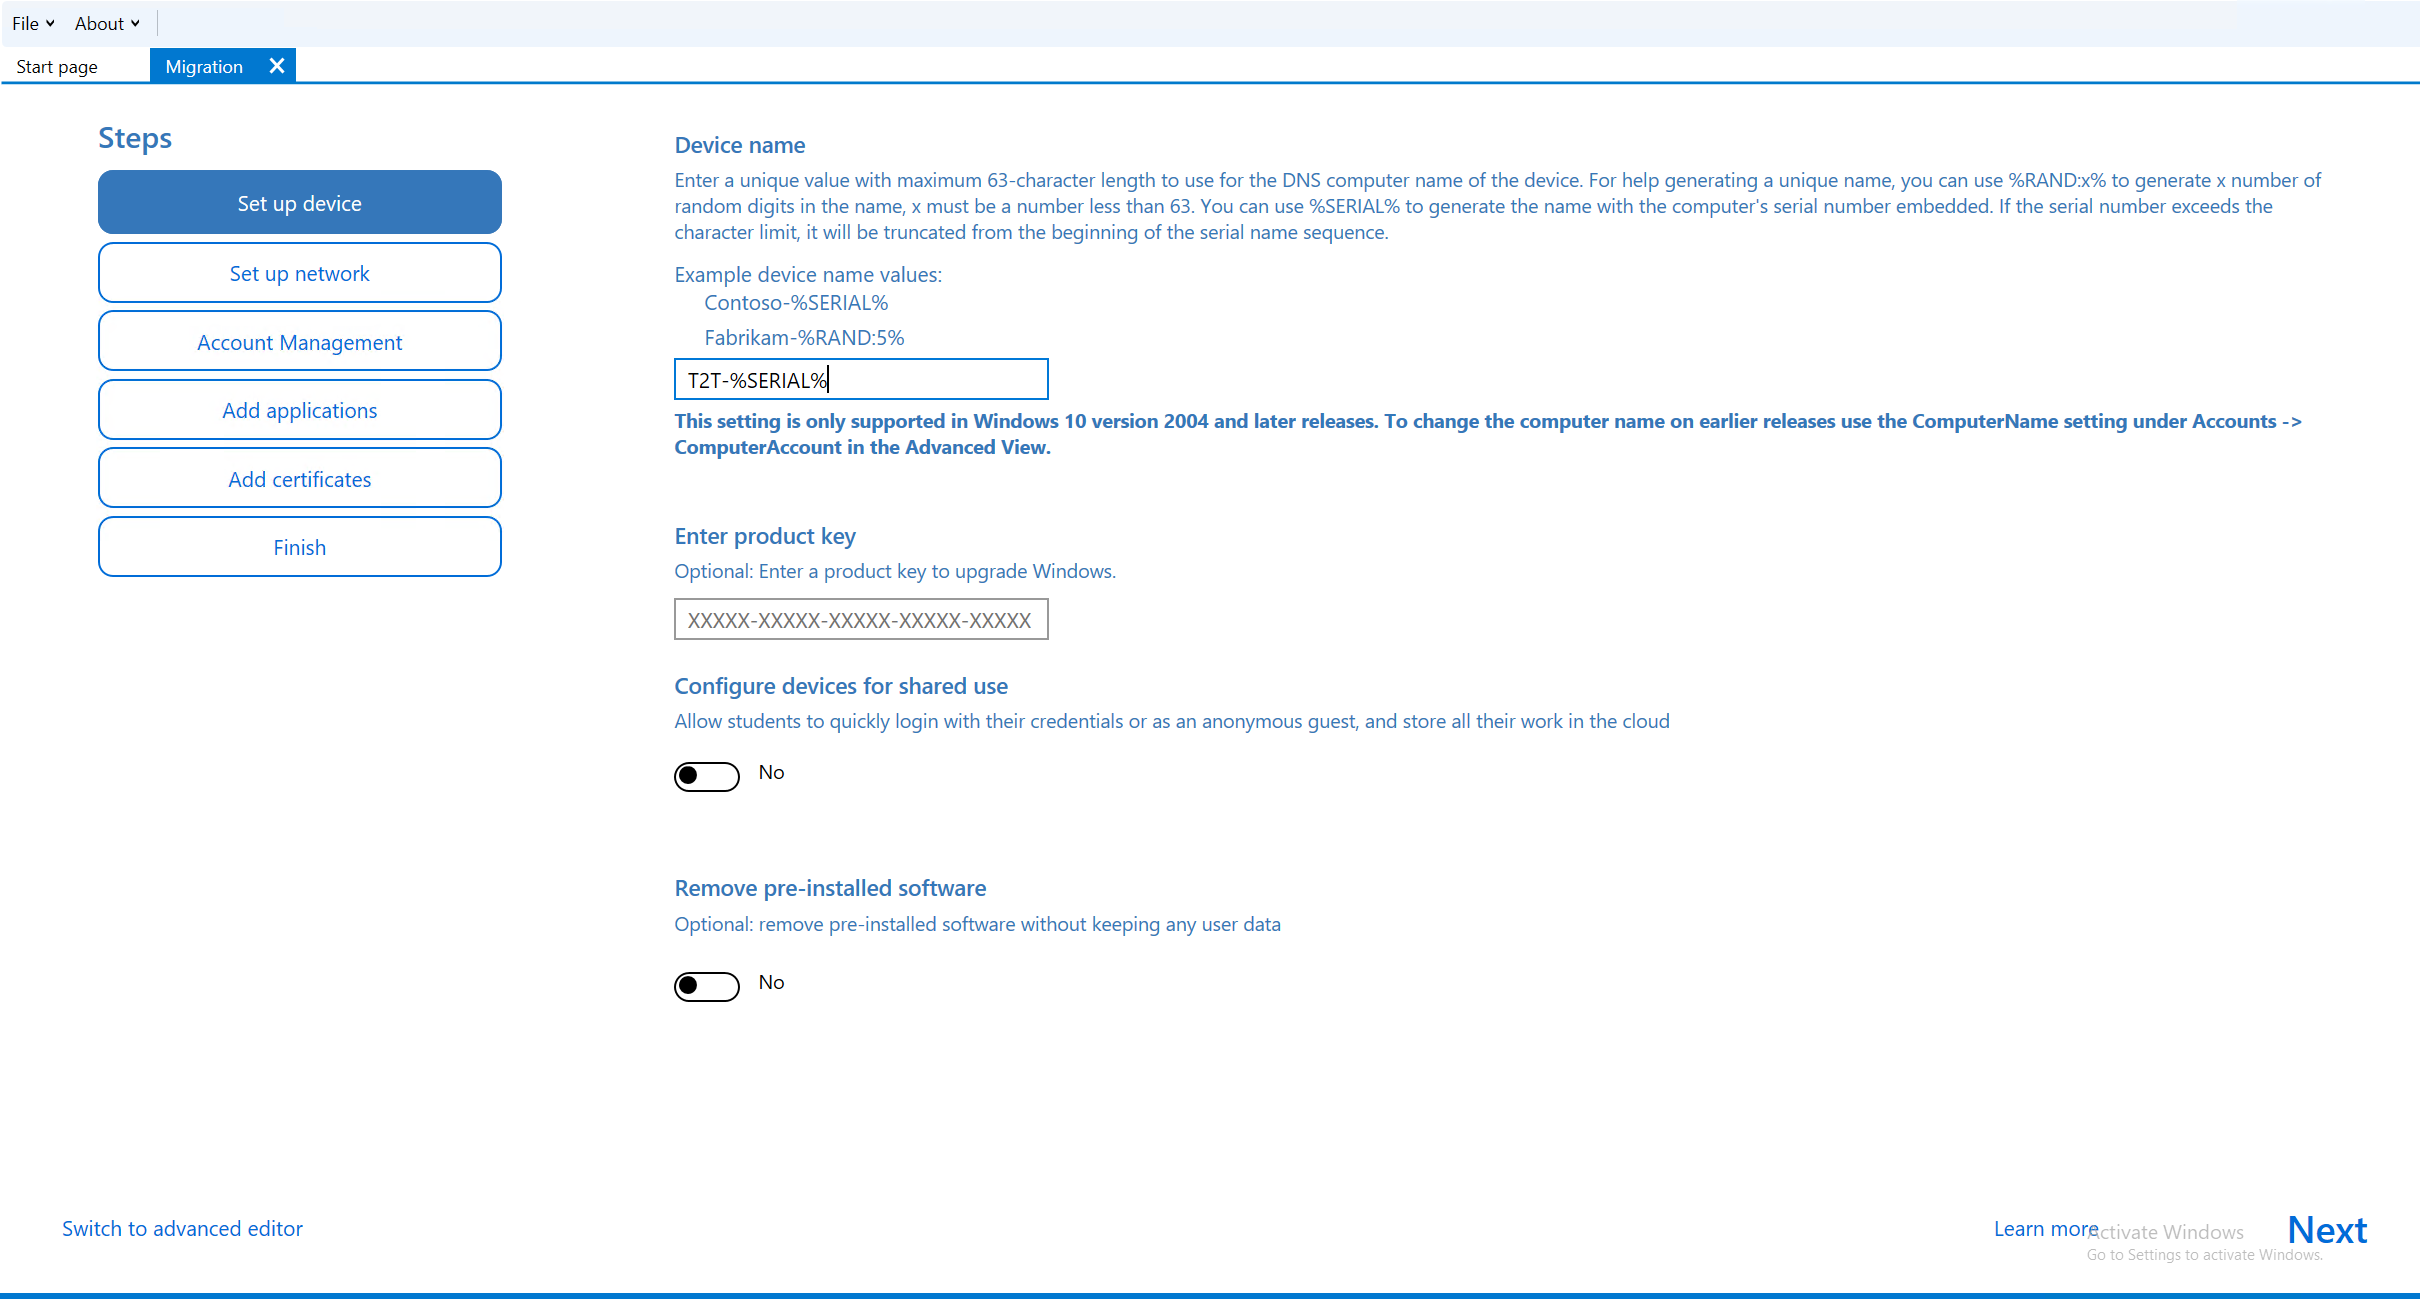
Now we will go through the guided setup, configuring very few things along the way. Starting on the “Set up device” page, go ahead and provide a naming schema for the PC. Remember, this is for the PC joining Tenant B, so make sure you choose a name accordingly (no different then choosing a naming convention in Autopilot).
On the “Set up network” page, turn off the Connect devices to a Wi-Fi network option. We don’t need that. Click Next.

This is the important step. When you get to “Account Management”, select Enroll in Azure AD.
Set Refresh AAD credentials to “Yes”.
The standard time for the token expiration is 6 months, so leave that alone.

Click on the Get Bulk Token button. You will be prompted to sign into Azure AD and I recommend you do so with Global Administrator privileges.

When asked to Stay signed in to all your apps, uncheck the box and click on No, sign in to this app only.

If successful, you should see that the bulk token was fetched successfully from Azure AD.

Before clicking next on this page, go ahead and set a local admin account. This will give us a way to access the device locally should we encounter an issue with the migration process.
Click next through the Add applications and Add certificates pages. When you get to the Finish page, click on “Create”.

Your provisioning package is now available in the %USERPROFILE%\Documents\Windows Imaging and Configuration Designer (WICD) directory. There are several other files generated with the package, including a “customizations.xml” file that is a manifest of everything we configured while going through the guided setup.

If you do not get a bulk token and receive an error, try the following:
Log into Azure AD at the brand new entra.microsoft.com portal.
Select Enterprise applications -> All applications -> Windows Configuration Designer (WCD)

On the application page select Permissions and then click Grant admin consent for <TENANT NAME>.

SCRIPT VERSION
If you can’t seem to get the the provisioning package created with the Configuration Designer app, you can follow this alternative method. The man himself, Michael Niehaus, wrote a great piece on this so I recommend giving it a read. We’re going to use the AADInternals PowerShell module with a different version of the Configuration Designer to generate the package.
Download the Windows Assessment and Deployment Kit (ADK) from here and run the installer.
During the installation, at the Select the features you want to install screen, you only need to check the “Configuration Designer” option and click “Install”.

Install and import the AADInternals PowerShell module. Like most modules, this is a straight forward process.
Install-Module AADInternals -Force
Import-Module AADInternals
*We’re going to generate the package with a full PowerShell script later, which will also install and import for us. I personally like to go through the steps piece by piece to get a better understanding of what’s going on.
Here is a breakdown of how the process works with the module:
FIrst, authenticate to Azure with user credentials. The script prompts for username and password.

After authenticating, generate a BPRT and set an expiration date.
Next, we’ll construct the XML used to create the provisioning package and insert our BPRT. This is basically the inverse of what we did using the Configuration Designer, which generated the XML after the package creation.
The nice thing about this is that the XML we’re constructing is identical to the “customizations.xml” generated from the designer.

On the left, is the XML we built in the script. On the right is the one generated with the package. So if you’re using this method, you can easily add the settings for the local admin and device name by inserting them into your XML.
*I’ll place an XML template in the migration repo.
With the BPRT generated and placed in the XML, we now simply call the Configuration Designer executable from the ADK, pass our XML file, and choose an output path.
ICD.exe /Build-ProvisioningPackage /CustomizationXML:$Filename.xml /PackagePath:$Filename.ppkgNavigate to your output destination and you’ll see a familiar group of files.

The full PowerShell script for generating the package with AADInternals can be downloaded here.
Next time…
Now that we have our provisioning package created, we’ll be able to add our PC to Tenant B. However, when it enrolls to Intune it won’t have a primary user attribute. We’ll need a task to fix that…