Tenant to Tenant Intune Device Migration Part 1: The Orchestrator
Alright, let’s get started!
Most of the work that happens with the device migration between Intune tenants happens with PowerShell scripts talking to the Microsoft Graph API. There are a total of 13 scripts that run the process- 7 PowerShell and 6 XML files for tasks.
Today, we’re going to focus on the primary script that is run from Intune and orchestrates the migration from Tenant A to Tenant B.
*For more info on what we’re doing, what Tenant A and Tenant B are, or if you’re just generally confused, check out the beginning, here!
Start the Migration
Our primary PowerShell script is called StartMigrate.ps1 and can be downloaded from here. The script is packaged along with others inside of an .Intunewin application and deployed from Intune in Tenant A, prior to migration.
This script can be broken down into 10 steps:
Copy files to the local device
Authenticate to Tenant A via Microsoft Graph
Capture current device info
Enforce required policy
Initiate user data migration to new profile
Remove previous Intune enrollment artifacts
Leave Tenant A Azure AD and Intune environment
Create post migration tasks
Install provisioning package to join Tenant B
Delete objects from Tenant A and reboot
Let’s walkthrough the details of each part and what you need to do in order to set up the script.
STEP 1: LOCAL FILES
Because we have a lot of scripts to run on the PC, we need a place to store them from the Intune app package. We’re creating the “C:\ProgramData\IntuneMigration” directory as a local hub to unpack in. We will also start our transcript for logging in the same directory.

I use a “flag” file so that Intune can detect that the package was installed due to it not being an actual application.
One optional step here is to throw in a quick ‘whoami’ command to ensure the script is running in NT AUTHORITY\System context.

STEP 2: Authenticate to MS Graph
Now we have to authenticate to Tenant A so we can start pulling device info from the current state, as well as deleting some things later on.
Create an Azure App registration in Tenant A with the following permissions:
Device.ReadWrite.All
DeviceManagementApps.ReadWrite.All
DeviceManagementConfiguration.ReadWrite.All
DeviceManagementManagedDevices.PrivilegedOperations.All
DeviceManagementManagedDevices.ReadWrite.All
DeviceManagementServiceConfig.ReadWrite.All
Consent to the permissions and generate a client secret value for the app. Save that value along with the app/client ID and tenant name.
They will be constructed here:
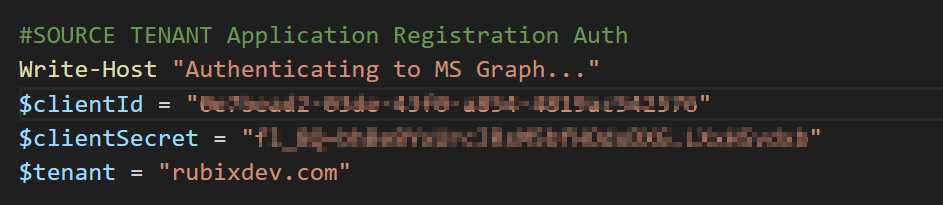
The next few lines obtain the authentication token from the app registration information and provides us headers for our upcoming graph calls.
*If you’re not familiar with how to create an Azure App registration, follow the steps here.
STEP 3: GET CURRENT INFO FROM DEVICE AND GRAPH
Next is gathering some device information from Tenant A. We’re going to capture the serial number of the PC and use that to retrieve both the Intune device object ID, Autopilot object ID, and the Autopilot Group Tag attribute. We’ll also need the current, active username for a few things later.
The serial number is captured with a simple WMI call:
$serialNumber = Get-WmiObject -Class Win32_Bios | Select-Object -ExpandProperty serialnumberWe can construct our graph calls to Intune and Autopilot with a filter to contain our serial number:
Autopilot call:
$autopilotObject = Invoke-RestMethod -Method Get -Uri “https://graph.microsoft.com/beta/deviceManagement/windowsAutopilotDeviceIdentities?`$filter=contains(serialNumber,’$($serialNumber)’)” -headers $headersIntune call:
$intuneObject = Invoke-RestMethod -Method Get -Uri “https://graph.microsoft.com/beta/deviceManagement/managedDevices?`$filter=contains(serialNumber,’$($serialNumber)’)” -headers $headers*Note the ‘`’ symbol used before the $filter in the call; that is required because we’re doing this in PowerShell.
The Intune and Autopilot object IDs will be used later in the script to make graph calls.
The Group Tag variable will be stored in an XML file, locally, so we can retrieve it for some post-migration tasks. We will use the active username variable for data migration and an upcoming task, so let’s store that in the XML as well.

STEP 4: SET REQUIRED POLICY
In order to ensure the migration is successful, we need to make sure two local policies are set. We can do this with the registry.
First, we need to verify the PC can authenticate with MS credentials for non-email services. This is needed for the Azure AD join to Tenant B so we will configure the AllowMicrosoftAccountConnection policy to enabled.
Next, we need to make sure that only the “Other User” option is present after the first reboot.

Until the post-migration steps are complete, users may try to sign into their Tenant A account, and even though it should not work, it’s not a great experience. That means we will set the DontDisplayLastUsername policy to enabled.

STEP 5: USER DATA MIGRATION
This is a tricky one, and I’ll admit- there are some factors that might force you to skip this one. There are also scenarios where we hopefully won’t need it.
Basically, the idea is that we copy all of the current users Tenant A profile data to a temporary location. After they sign into the device with Tenant B credentials, we then copy everything from the temporary location back to the newly created user profile associated with Tenant B. We can then delete both the Tenant A profile and the temporary files.
If the OneDrive Known Folder Move is used and enforced in Tenant A, then the assumption is that data will be migrated to the user identity in Tenant B. In that case, we can skip this as Intune policy in Tenant B should enforce Known Folder Move and the user data will automatically be present after migration.
Unfortunately, not everything lives in OneDrive. A lot of local data still sits on the device, especially application settings found in the %APPDATA% and %LOCALAPPDATA% paths. Assuming that is needed, let’s go ahead and migrate.
To start, we need to check on three numbers:
How much data are we transferring?
How much free disk space is on the device?
How much disk space is required to complete the migration?
To get the first number, we need to determine what is being transferred. The $locations array is designed for paths to be added or removed easily depending on what we want to move.

You can add “Downloads”, remove “Pictures”, etc.
EDIT: After reviewing the script to restore local data in a future post, I moved the $locations variable to STEP 3 so the paths can be captured in the XML and retrieved later. The GitHub script has been updated to reflect the change.

With the paths determined, we need to know the total, combined size of them. We do this by iterating through the $locations array with a “foreach” statement calculating the size of the item and adding it to the $totalProfileSize variable.

The next number we need is the available disk space on the PC. This is fairly straight forward by using this one-liner:
$diskSize = Get-Volume -DriveLetter C | Select-Object SizeRemaining -ExpandProperty SizeRemainingFinally, we need to calculate how much disk space need to successfully copy the user data to the new profile. The first copy is from the original location to the temp location, so that’s one copy, or twice the size of the data. Then we need to copy from the temp location to the new user profile, which brings us to three times the size of the data.
All we have to do is capture $totalProfileSize * 3 in a variable, and we have our third number.

Knowing the numbers we have to work with, there is a simple choice; is three times the user data worth of free disk space available? If so, we can go ahead and migrate. If not, this part is skipped. For real world application, this is going to be an organizational decision. Do you want to stop the migration process here if we can’t move the date to a new profile? Do we continue anyway and manually move the data later? Ultimately, whichever solution works will have to be incorporated. The script template is set to just proceed with the migration at this point.
Moving the data is simple. Again, we iterate through the $locations array and take the following actions:
Set the local data path: $userPath = “C:\Users\$($user)\$($location)”
Set the temp path in the public folder: $publicPath = “C:\Users\Public\Temp\$($location)”
Create the $publicPath
User robocopy command to copy items from $userPath to $publicPath
We use robocopy because of the verbose logging and ability to exclude the junction paths in the %APPDATA% and %LOCALAPPDATA% folders.
STEP 6: remove previous enrollment artifacts
When a PC is enrolled in Intune, there are some remnants that remain on the device even after it leaves the environment. The first part is the “Enrollments” entry in the registry. Navigate to HKLM:\SOFTWARE\Microsoft\Enrollments and you will find many, many GUID objects. We’re looking for the one that contains actual enrollment information.

We are searching for this key and deleting it.
The other area that needs to be wiped is in the task scheduler. Navigate to Microsoft\Windows\EnterpriseMgmt and you will see the same GUID from the previous step in the registry. We’re going to remove all of these tasks.

STEP 7: LEAVE TENANT A
Time to make our exit! We use dsregcmd /leave to remove the device from Azure AD join and Intune enrollment of Tenant A. This will not necessarily remove the objects, but will leave from the device stand point, which is all we need. We can take care of the objects later
STEP 8: POST-MIGRATION TASKS
While we’re almost done with exiting Tenant A, there’s going to be a lot more work once we get to Tenant B. Fortunately, we can automate most of that by setting tasks to run more scripts after the logon with new credentials. Here are the activities that we need to set tasks for:
Register device in Tenant B Autopilot
Escrow the BitLocker Key to Tenant B Azure AD
Update the primary user of the device in Intune in Tenant B
Apply the Group Tag from Tenant A to the Azure AD object in Tenant B for proper grouping
Initiate the user data restore from our temp location
Automatically reboot once more after the initial reboot
To set these tasks, we’re going to reference our $packageFiles variable from all the way in the beginning. All the task files end in the “.xml” extension and are named appropriately. So we will iterate through the that variable and for each file that ends in “.xml”, we will create a task from that file with the same name.

STEP 9: JOIN TENANT B
With our tasks set and our device un-joined from Tenant A, we can now join Tenant B. This is done by installing the provisioning package included with our scripts. The package users an Azure bulk enrollment token that places the device in the Tenant B Azure AD and Intune environment, but not registered to a user.
We will go into further detail about the package and how it works in an upcoming part of this series.
STEP 10: DELETE OBJECTS AND REBOOT
This is the end. To clean things up before the user signs in with their new Tenant B credentials, we’re going to ensure the Intune and Autopilot objects are removed from Tenant A so we do not encounter issues on the Tenant B side.
To do this, we simply use the $intuneID and $autopilotID objects from earlier and make a graph call to delete them:

After that, we simply run shutdown -r -t 30 to reboot the PC in 30 seconds.
Next time…
This is by far the largest script in the bunch for this process. There are a lot of components and we want to make sure everything is correct, being that this is the primary orchestration for the whole process.
Don’t worry that we glossed over some details; the provisioning package, the task files… we will dive into all of that in the next parts of the series.