Elevate with Windows 11
Yes it's been a while; no I don't want to talk about it. What I do want to talk about is the new Endpoint Privilege Management capability that is now live in Microsoft Intune. This has been a long time coming and I think we can all agree it works great and makes managing Windows with Intune that much easier.
What's not so great, however, is how this feature can seem broken to your end users on Windows 11. Luckily, I have a fix you can use to get over the rough patches so that everyone and their mother can start enjoying Endpoint Privilege Management on Windows 11.
Also, from here on out I will be referring to Endpoint Privilege Management as EPM because let's be honest- who has that kind of time to type that out?
What’s supposed to happen?
I'm not going to detail how to create and assign the policy for EPM here because that's not the point. There are some great writeups already online about it if you haven't set it up. I may decide to do one in the future if I encounter any interesting obstacles.
For now, let's assume you have a policy applied to your Windows 11 device. On a Windows 10 PC, users can simply right-click on an application, and you can see the "Run with elevated access" option. This will appear in the context menu once the Elevation settings policy is applied from Intune. When the user selects "Run with elevated access", depending on the policy, they will either see the appropriate prompt to run the app, be prompted that they cannot run the app as elevated, or automatically have the app launch in an elevated session. That should be the end of it.

What actually happens?
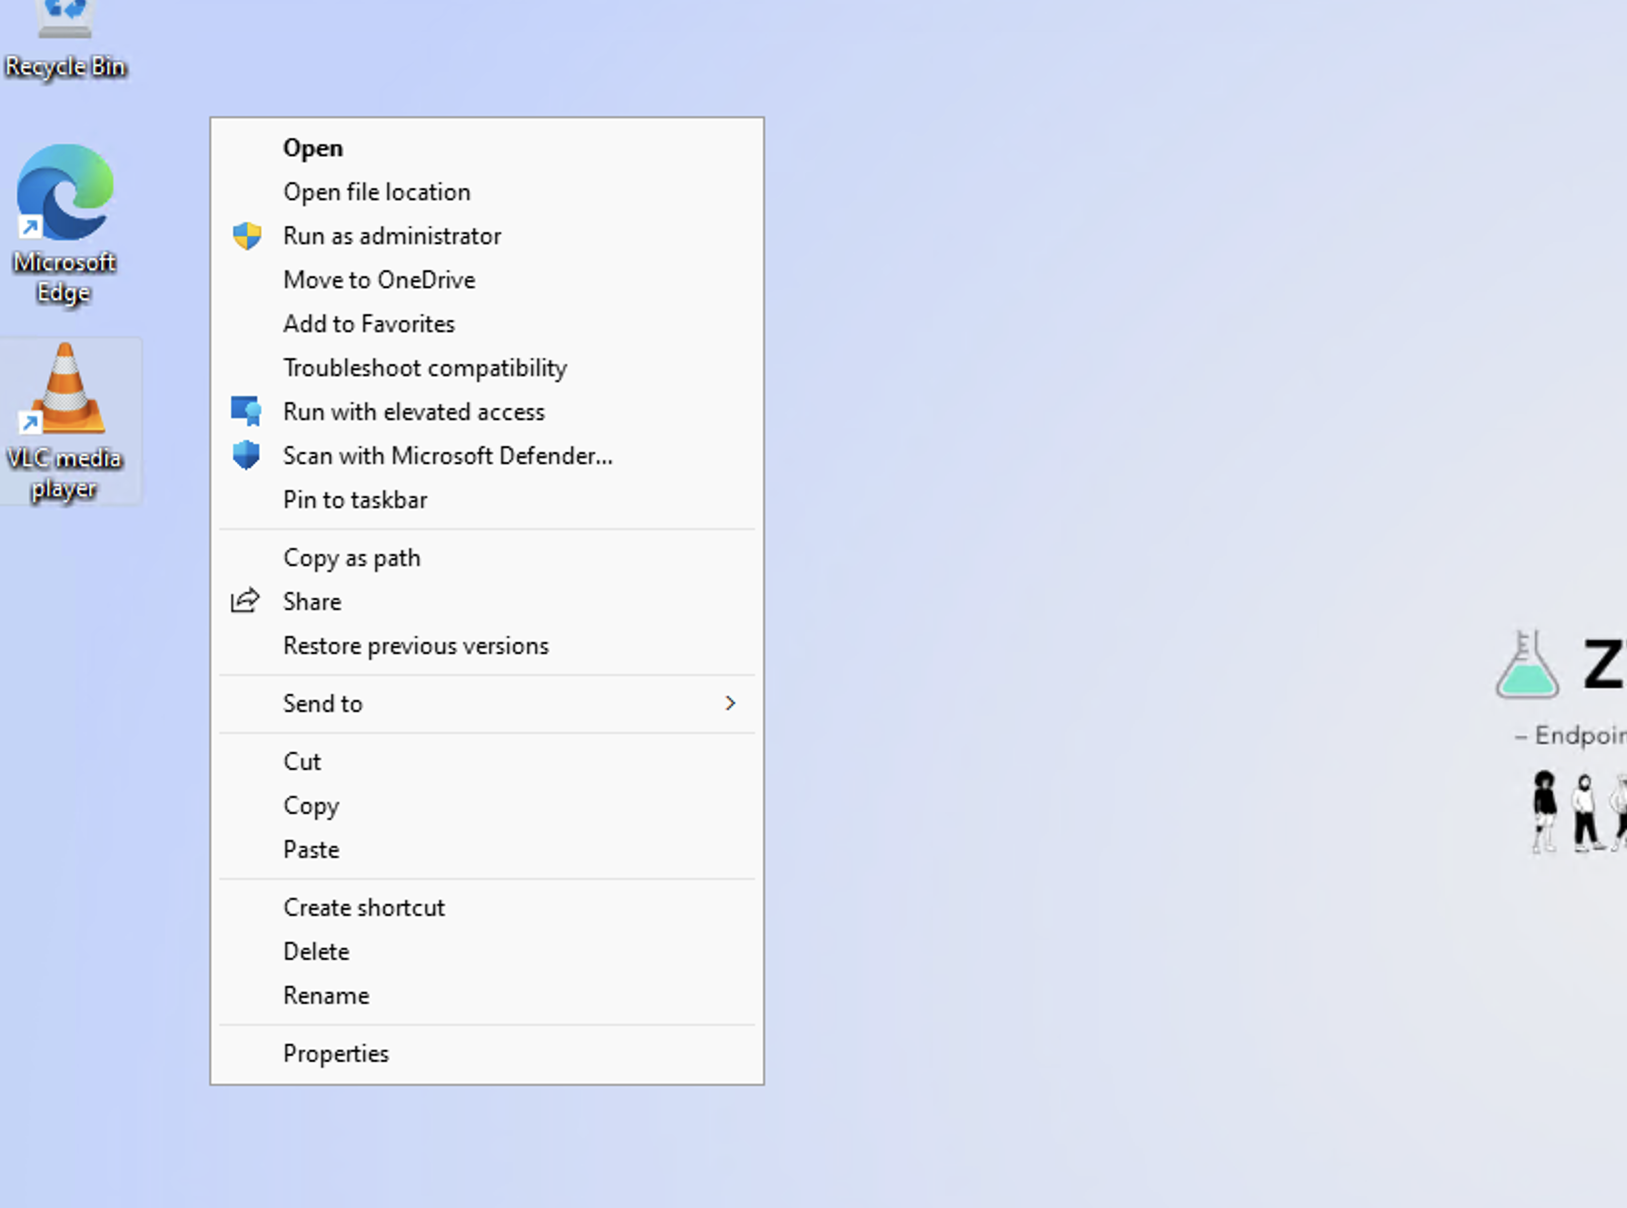
So here's the issue; check out what happens when a user right-clicks on the same app in Windows 11:

We all know the Windows 11 context menu is different by default, but the problem is more than cosmetic.
The traditional "Run as administrator" option will not work, as it is not used by Intune EPM. We need the "Run with elevated access" option with the little, blue icon. But where is it?
The problem
The actual problem is that the "Run with elevated access" option will not show in the default Windows 11 context menu. You need to select "Show more options", and then select what we need. If you've been in the IT field for any length of time, you're probably thinking what I'm thinking: are users going to know to click "Show more options"?

We both know the answer is no.
The solution
If you've been an avid reader of the blog (or just know what you're doing with Autopilot), the fix is easy. We will deploy a registry line to force Windows 11 to use the classic Windows right-click option menu. The registry hive is located in HKEY_CURRENT_USER, but because there is no current user during Autopilot, we can use this trick:
reg.exe load HKLM\TempUser "C:\Users\Default\NTUSER.DAT" | Out-Host
reg.exe add "HKLM\TempUser\Software\Classes\CLSID\\InprocServer32" /f /ve
reg.exe unload HKLM\TempUser | Out-Host
Add these lines at the bottom of the AutopilotBranding.ps1 file in the package. For those who aren't familiar with the package, get it here from the man himself: GitHub - mtniehaus/AutopilotBranding
Now you can elevate
With these pieces in place, you can now use Autopilot to deploy a new Windows 11 PC and right click on the app we want to elevate. Now we can see the expected process. Good luck!