How to configure Autopilot Device Preparation Part 1: Set it up
Microsoft has just released its latest flavor of Windows Autopilot known as Autopilot Device Preparation, and it’s been getting a lot of press this week. Some call it Autopilot V2, some call it “half-baked”, and some have said much worse. But regardless, it’s here and we’ve been putting it through its paces.
If you haven’t already, check out my videos on it here.
As a companion to those videos, I’ll be publishing several articles on getting started and setting it up, testing it out, and maybe some troubleshooting. In this first post, we’ll look at getting started and creating our device preparation policy.
Prepare the tenant
Allow personal enrollment
The first thing we want to do is make sure we are allowing personal enrollment of Windows devices in Intune, as that is the only way to currently test APV2.
As stated in the Microsoft docs above, we will soon have the ability to upload a PCs manufacturer, model, and serial number to the corporate identifiers list in order to block personal devices again.
I’m going to show you how to allow personal devices with the default platform restrictions, but if you’d like, you can follow this link to create a new platform restrictions policy to test with.
Logon to intune.microsoft.com and navigate to Devices > Enrollment and select Device platform restriction

Select Windows restrictions and then click All users

Click Properties and ensure that Personally owned is set to Allow for Windows (MDM)

Create a special device group
One of the new features of APV2 deployment profile is that it will place a PC in a device group for us during provisioning. The reason I call it a ‘special’ group is because it must adhere to the following:
Be a Security group
Have the Membership type set to Assigned
Be owned by the Intune Autopilot ConfidentialClient service principal
The first two are no problem, but what is that last thing? Don’t worry; I’ll explain.
To create the group in Intune, navigate to Groups > All groups and click New group

Fill out the following fields:
Group type: Choose Security from the drop down
Group name: This one is obvious; name the group what you’d like
Group description: See above
Membership type: Assigned
For Owners, click No owners selected

On the “Add owners” page, search for Intune and select Intune Autopilot ConfidentialClient and then click Select and then create the group

IMPORTANT: Make sure the service principal ID for the owner is f1346770-5b25-470b-88bd-d5744ab7952c. It may also have a display name of Intune Provisioning Client, but if the ID is the same then it doesn’t matter. If for some reason the ID is not present at all, you will have to manually add it. I will guide you through that in the next section.
Add the client manually (only if required)
When you create your group based on the previous section, and you try to add the Intune Autopilot Confidental/Provisioning client as the owner, you may find it does not exist.
If that’s the case, perform the following:
Launch PowerShell and install the Azure AD module with the following command
install-module azuread -confirm:$false -force
Import the module
import-module azuread
Connect to the Microsoft Graph and authenticate with Global Administrator or a role that has permissions to add service principals
Connect-AzureAD
After you’ve signed in, run the following command to add the service principal
New-AzureADServicePrincipal -AppId f1346770-5b25-470b-88bd-d5744ab7952c
Now repeat the steps in the previous section to add the client as the owner to your group. Remember, it may display as Intune Provisioning Client or Intune Autopilot ConfidentialClient; either way, it should have the f1346770-5b25-470b-88bd-d5744ab7952c ID so you’ll be fine.
Configure device preparation
Now that the tenant is ready, we can configure our device preparation policy. We’ll walk through each phase of the policy.
While still logged into Intune, navigate to Devices > Enrollment and select Device preparation policies

Click + Create

Introduction
The first section, Introduction gives you a brief overview of the workflow.
Click Next

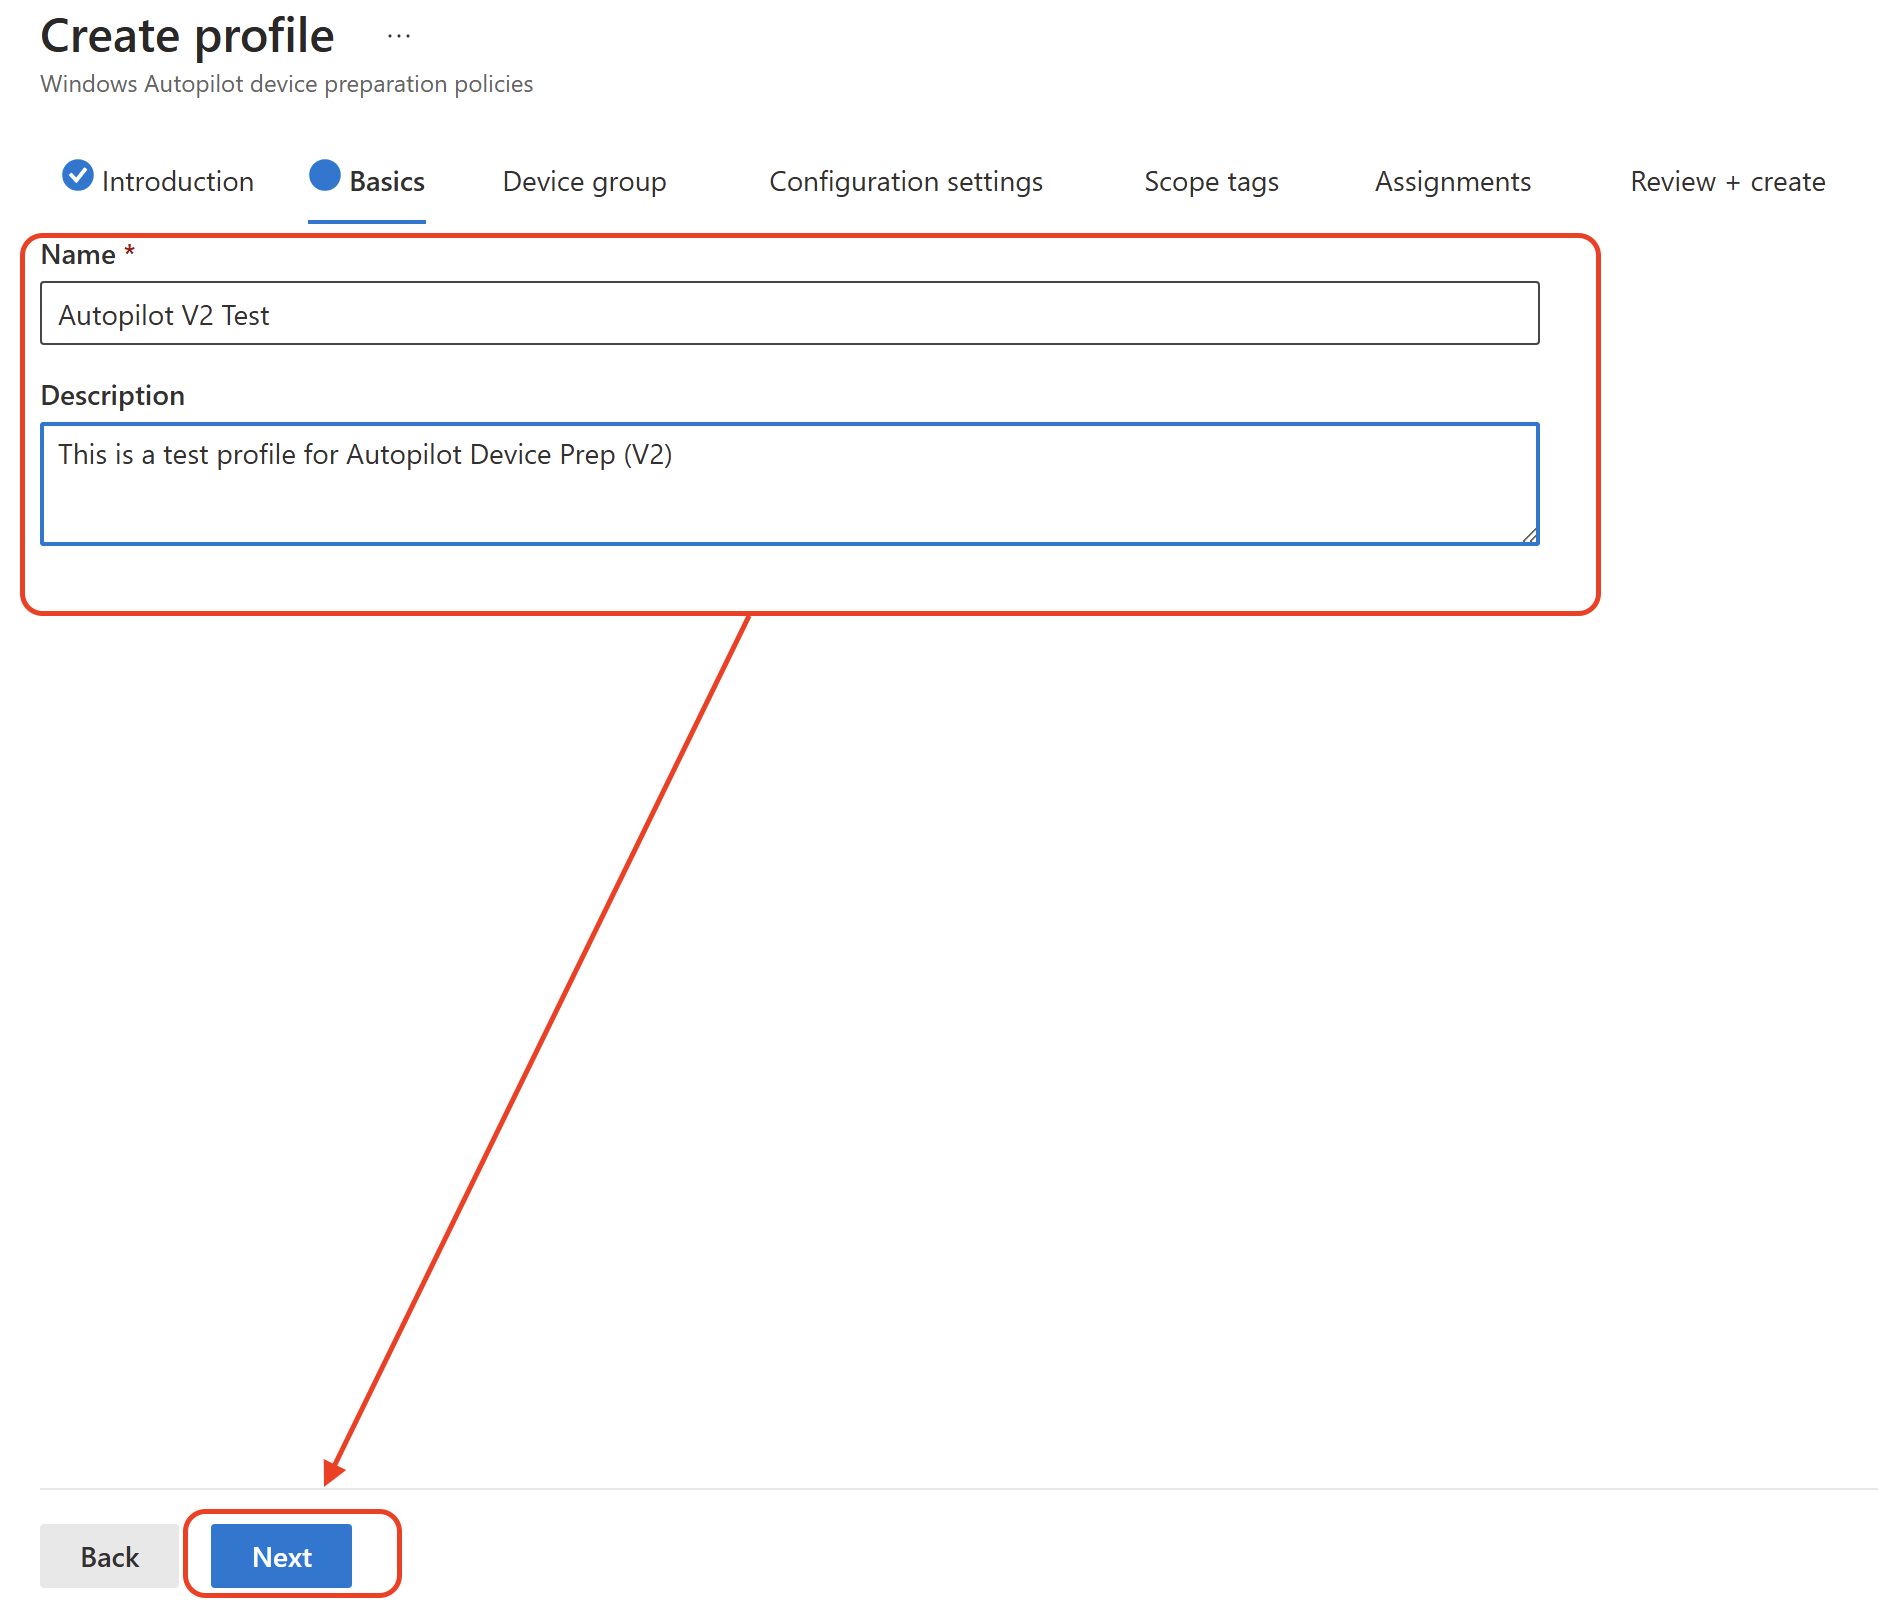
Basics
In Basics, fill out the following fields:
Name: Once again, as easy as it gets; name your policy
Description: I’ll let you figure this one out too
Click Next
Device group
The group you choose here is the group that we created in the previous section. Once the user signs into the PC, Autopilot will place the device in this group.
In the search box, enter the name of the special group you created.

Select your group when it’s displayed and click Next

Configuration settings
The configuration settings are the real bulk of the policy. There are four sections: Apps, Scripts, Deployment settings, and Out-of-box experience settings.

Apps
Click + Add in the Apps section to bring up the Select Apps menu

This is similar to the ESP (Enrollment Status Page) from Autopilot V1. Here, you can choose up to 10 applications that will be monitored for installation during the provisioning. Keep in mind, in order for the apps to be deployed, they must be assigned to the device group you created in the previous section.
Click + Add next to each app you want to add. You will see them populate below under Selected Apps
When finished, click Save

Out-of-box experience settings
Complete the following fields and options:
Minutes allowed before showing installation error: Pretty self-explanatory; basically how much time you should allow for your apps and scripts to finish provisioning before displaying an error to the user
Custom error message: Here you can write your own message the end user will see in the event of a provisioning failure
Allow user to skip setup after multiple attempts: If the provisioning repeatedly fails, the end user will have the option to proceed to the desktop. Be aware that this means the user may be using the PC without critical applications or settings present.
Show link to diagnostics: If the provisioning fails, a link will be displayed so the end user can click on it to generate logs needed to troubleshoot the issues.

Scripts
Click + Add in the Scripts section to bring up the Select Scripts menu
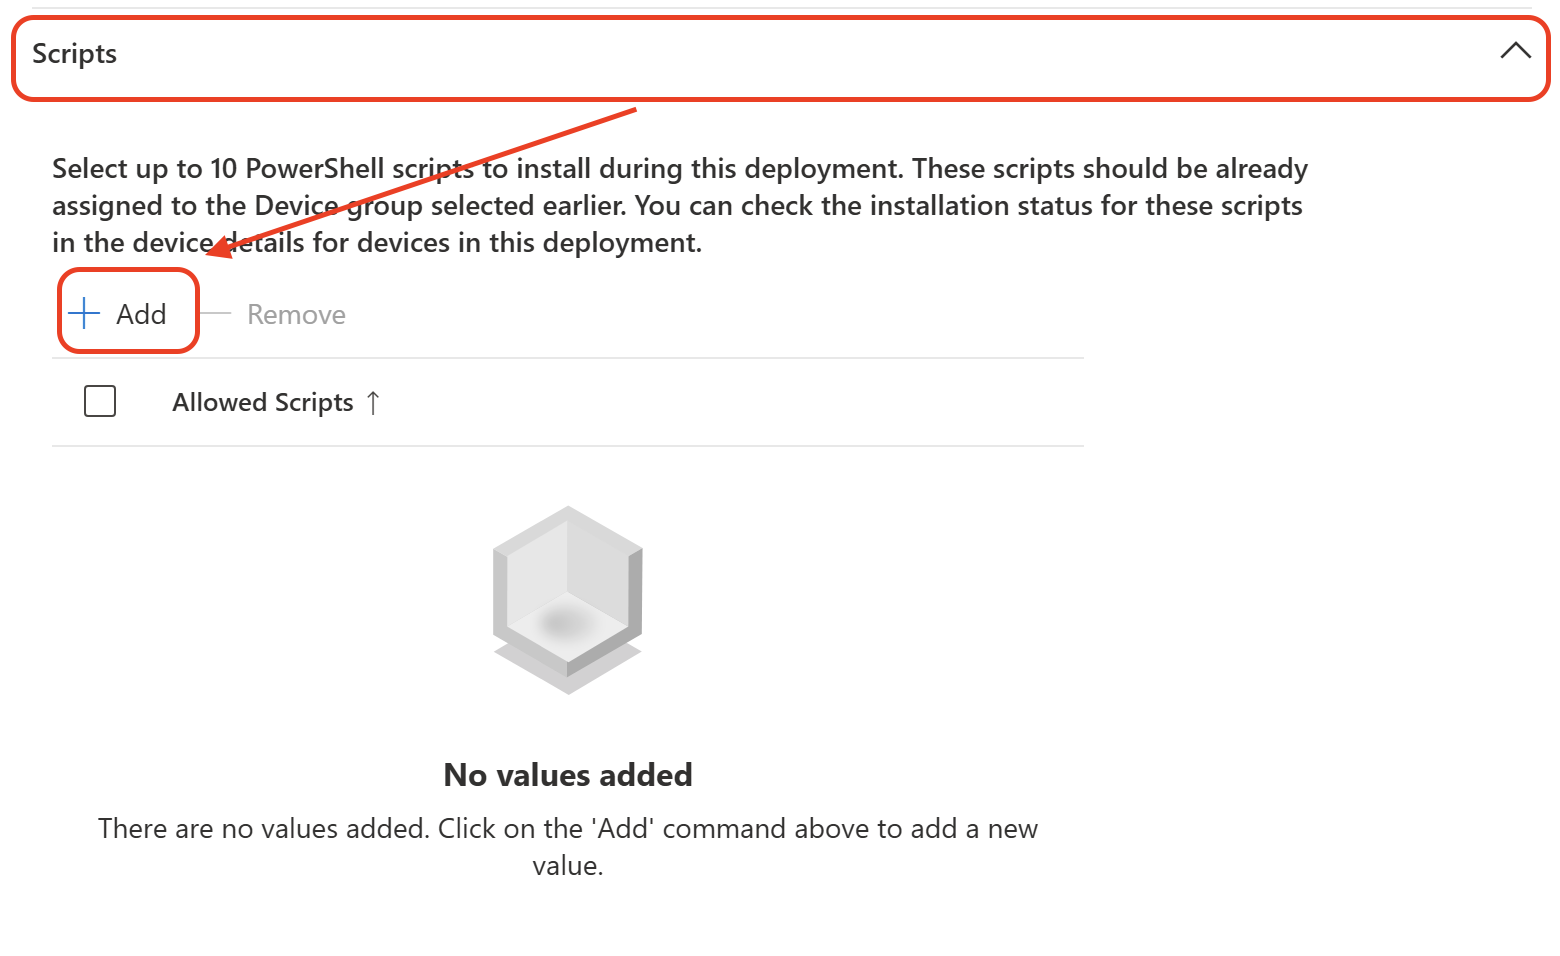
This part is completely new to Autopilot, as previously any PowerShell scripts assigned to the device would be enforced during provisioning. Now, just like the Apps, you can choose which scripts will take place during Autopilot provisioning if they’re assign to your device group.
Click + Add next to each script you want to add. You will see them populate below under Selected Scripts
When finished, click Save

Deployment settings
The settings Deployment mode, Deployment type, and Join type all currently have one value that cannot be changed. APV2 is designed for a single-user driven Entra ID (Azure AD) joined PC.
User account type: Choose Standard User or Administrator depending on what privilege you want to provide to your end user upon completing the provisioning

Scope tags
Here, you can apply any scope tags you utilize in your tenant for this deployment profile.

Assignments
These settings for APV2 are designed to be user targeted. In this section, you will select the user group/groups that will receive the device preparation policy.
In the search box, enter the name of the user group you’d like to use
Select your group when it’s displayed and click Next

Review + create
Take a moment and review the settings you’ve configured for each phase.
When ready, click Save

Done for now
Good job! You’ve set up Autopilot device preparation in your tenant. In part 2, we’ll look at how to setup physical PCs and virtual machines for testing and walk through the enrollment process.